Optimizing js bundle
Many of us reach the point where it becomes necessary to optimize the site load to reduce the outflow of users and improve the responsiveness of the UI.
It's especially true because at the moment most of the traffic comes from mobile devices, which are usually less performant than desktop, and are more often used with 3g, LTE. Also, mobile traffic in some countries can be expensive.
Therefore, it makes sense to reduce the costs for site users.
In this article, I'm considering how you can optimize the site load built on react and webpack. Some information is suitable for other platforms.
Measure
Before starting work on optimization, initial measurements should be taken and recorded. It is helping to track progress and identify problem areas.
Note about local and remote measurements
If you're using such tools like Google Lighthouse, the results of measurements can vary greatly depending on the characteristics of the computer; it is a local or remote website and in what environment the website is running. I recommend to carry out a series of measurements in each combination (local dev, local prod, remote staging, remote prod) before and after making changes to have a clearer picture of the performance change in every environment.
Tools
The first tool is the Network tab that exists in many browsers.
But further you wanted to see more information about site performance.
Here are three services which you may want to try.
I recommend using more than one service to measure control points (before/after optimization) and local lighthouse in Chrome for development.
Lighthouse
Powerful tool which not only can test performance, but also PWA, accessibility, and SEO. If you are using Chrome, you just need to open the Audits tab in DevTools. That's the lighthouse. Also, you can install it as an extension in the browser, and also, can run it as a node app. It allows you to fine-tune the parameters, and also makes it possible to automate measurements. There are many services available that are using lighthouse under the hood, including (PageSpeed)[https://developers.google.com/speed/pagespeed/insights/]. The more information you can find on the official website https://developers.google.com/web/tools/lighthouse
Webpagetest
https://www.webpagetest.org/ Free and quite powerful service that allows you to configure many measurement parameters, and also provides rich reports.
GTMetrix
https://gtmetrix.com/ Another great service, which can save the reports, do monitoring, and provides recommendations about how to improve the speed in many aspects. A paid PRO mode with advanced features is also available. Besides, you can work with the service through the API.
Optimize
The basic rule is to eat use as little as possible heavy libraries. It is very tempting to screw some shiny toy that has many stars on the GitHub, which is very cool and can do many things. But this is the main reason why js bundles are very bloated.
webpack-bundle-analyze
To have an idea of why a bundle inflated to unmeasured dimensions, you need to understand what it's contents and sizes of its parts. (png) A fairly popular tool that conveniently displays the composition and volume of occupied libraries. It gives a visual representation of the composition of the bundles.
Other similar tools:
- http://webpack.github.io/analyse/ official stats analyze tool
- https://chrisbateman.github.io/webpack-visualizer/ - unlike webpack-bundle-analyze, you can see the volume of occupied libraries in all bundles
More info: https://survivejs.com/webpack/optimizing/build-analysis/
Bundlephobia
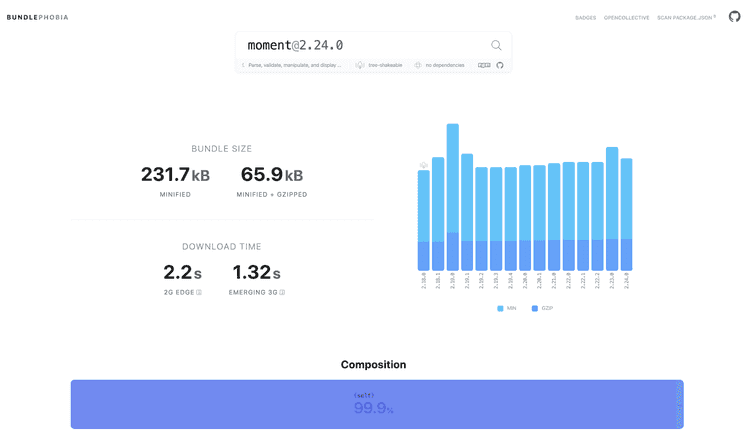 Check this excellent tool, especially if you just started to work on a new project.
It not only shows how much the size of the bundle increases when adding a library but also how the page load time changes. Also, it offers lightweight alternatives!
https://bundlephobia.com/
Check this excellent tool, especially if you just started to work on a new project.
It not only shows how much the size of the bundle increases when adding a library but also how the page load time changes. Also, it offers lightweight alternatives!
https://bundlephobia.com/
Sidenote: Also, consider these topics which contain information about how to replace heavy momentjs and lodash with pure javascript functions: https://github.com/you-dont-need/You-Dont-Need-Momentjs https://github.com/you-dont-need/You-Dont-Need-Lodash-Underscore
Code-splitting
Finally, to reduce the size of the bundle, this technique can be used. It allows you to break a large bundle into several small chunks. Here I consider how it works with webpack.
Using entry points
Consider you have several large sections that contain a different set of dependencies, but at the same time, they
compiled into one bundle. It makes sense to create different entry points for each section, which may or may not share a common/vendor bundle using cache groups.
Automatic code-splitting into bundles.
Using import () webpack can automatically allocate a dynamically imported component into a separate bundle.
For the convenience of working with dynamic components, you can use React.lazy or Loadable / Components.
By default, dynamic chunks are loaded only after loading the main bundle, which contains the code for loading these chunks.
You can also specify the special flags webpackPrefetch and webpackPreload in the comment in import to load the chunk in advance or load the chunk during idle time.
More details here https://webpack.js.org/guides/code-splitting/#prefetchingpreloading-modules
But to make the page load even faster, you need to use server rendering together with code-splitting.
Loadabe components
This library has advantages over React.lazy as it has SSR support.
Also, it is officially recommended by the (react team)[https://reactjs.org/docs/code-splitting.html#reactlazy].
With minimal effort, any component can be converted into a dynamic component.
But the coolest thing that loadable components allows you to do is to preload load exactly those chunks that were rendered on the server.
Thus, further reducing the load time of the site.
It has excellent documentation and is also easy to configure to work with SSR
https://loadable-components.com/docs/getting-started
Code-splitting with React On Rails
In the case of react on rails, you have the option to either use code-splitting or use the SSR. But not all at the same time. The fact is that under the hood, react_on_rails uses ExecJS to render on the server. ExecJs does not support some functions that are needed for code-splitting.
But there is good news! With React on Rails Pro, you can use SSR without limits! Also, the shakacode team recently added full support for loadable components with the ability to inline code directly in the HTML page for even quick rendering!
Conclusion
Of course, there are some other ways to reduce payload that I didn't mention in this article. Nevertheless, I believe that even these methods are enough to reduce the payload significantly. So, I wish your sites are fast and your users happy!
Closing Remark


